3 of 5
If the start of the recipe seems more like the buy list from Making It, you might not be too far off. Yes, the list is long. Yes, there are a lot of steps. And, yes, it is worth it.
Before putting on the apron, it is time to start building. Even if you need a visual to remember righty tight, lefty loosey, everyone can make this part too. In a way, it is like building a Lego set. It’s all about following the directions.
From Nailed It!: Baking Challenges for the Rest of Us by the Creators of Nailed It! with Heather Maclean.
Build the Cake Armature
- This is one of the quickest, easiest, and most inexpensive ways to build your own cake armature. Make sure to get PVC pipe that’s rated for drinking water, as it’s considered food safe and doesn’t need to be wrapped in foil (give it a good scrub before using it though!).
- Cut off the smaller end of PVC bushing so that it will slide completely onto the PVC pipe. (You can cut it with a PVC cutter, or a hacksaw, or ask an employee at the hardware store where you buy it to cut it for you.) Set aside. When we push the bushing onto the pipe later, it should be an extremely snug fit.
- Mark the center of the MDF board and drill a 3⁄4-inch (2-cm) hole three-quarters of the way deep (not all the way through). Cover the MDF board with foil or food-safe paper, leaving the hole open, to make the cake base. Line the inside of the hole with hot glue. Insert the PVC pipe. Allow to set.
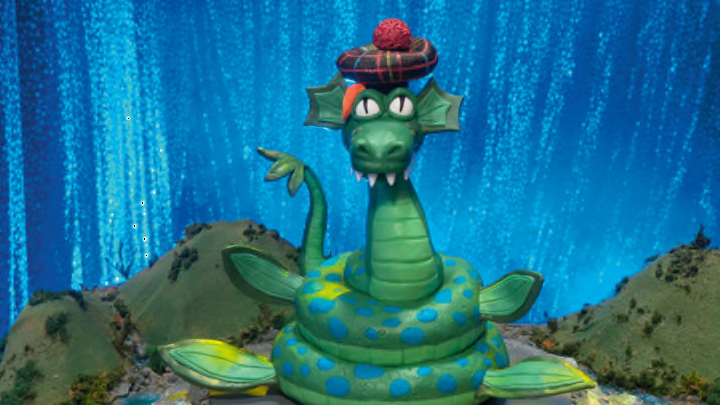
- Now onto the fun part, baking. Even though this recipe is specific for the Loch Ness Monster cake, there are quite a few good tips along the way.
- For example, the first step of splitting the batter into batches can apply to a variety of other recipes. Becoming a better baker is about absorbing information from actually making the recipe.
Make the Cake
- Since most kitchen mixers can’t accommodate the batter for a cake this large, we’re going to split the job in half.
- Preheat the oven to 350°F (175°C). Grease the cake pans. Cut out a circle of parchment paper for each pan and place in the bottom of each pan.
- In a large bowl, sift together 2½ cups (312 g) of the flour, 2 teaspoons of the baking powder, 1 teaspoon of the baking soda, and 1⁄2 teaspoon of the salt.
- In another large bowl, using an electric mixer, combine 4 of the eggs, 2 cups (400 g) of the sugar, 3⁄4 cup (1½ sticks/170 g) of the butter, 1 teaspoon of the butterscotch flavoring, and 1 cup (240 ml) of the milk. Add the dry mixture a large spoonful at a time and mix until just combined. Do not overmix. Use a spatula to scrape the sides and bottom of the bowl to incorporate the last bits of dry ingredients.
- Divide the batter between the two 10-inch (25-cm) pans, filling halfway, and bake for 24 to 28 minutes, until a toothpick inserted in the center comes out clean. Let cool.
- Repeat with the remaining cake ingredients, dividing the batter among the remaining three cake pans.
*FROSTED TIP: An easy way to pick up a large circle of fondant? Wrap it around a rolling pin!
Make the Buttercream
- We need a lot of buttercream for this recipe, and most mixers can’t handle this much powdered sugar at one time, so we’ll make it in two batches.
- In a large bowl, using an electric mixer, beat 1 cup (2 sticks/225 g) of the butter until creamy, about 1 minute.
- Add 4 cups (500 g) of the powdered sugar 1 cup (125 g) at a time, mixing until well combined.
- Add 2 teaspoons of the vanilla, 1⁄8 teaspoon of the salt, and 1⁄4 cup (60 ml) of the milk, and mix on high until thick and creamy. If the butter- cream is too thin, add more powdered sugar, 1 tablespoon at a time. If the buttercream is too thick, add more milk, 1 tablespoon at a time.
- Repeat with the remaining buttercream ingredients to make a second batch.
